Believe it or not, assembling a CI/CD (Continuous Integration / Continuous Delivery) system/pipeline is a straightforward task conceptually. At a high level, a CI/CD system is just a service that we configure to run some amount of tasks whenever an incoming change is scheduled for our code repo.
CI/CD systems are incredibly useful for validating a commit or pull request that we might receive. As Rails Developers, we probably want to: run our test suite, maybe some security auditing or code linting as part of our CI/CD pipeline.
We will use the CI/CD service Github Actions to accomplish this. Github Actions is a CI/CD service that is already integrated with our github project's repository. With it we can perform all of our seperate CI/CD jobs automatically.
A good place to start for us would be to create a test job that will run every time we:
-
pushto one of our branches (in our casemain) -
receive a
pull_requestfrom a contributor
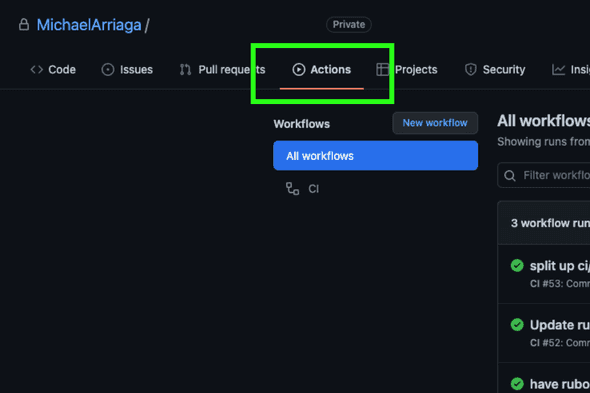
But how do we get started? Well, you know that button at the top of your project repositories that says "Actions"?
Yea that one! Click it and do some exploring!
After some tinkering, you'll probably have learned that in order to get started
with GitHub Actions, we must first create a workflow file. So let's do that
now.
Setting up the workflow file
For simplicity's sake (and to honor the 'Simple' in the title of this post) we
are going to set up just one job for our Rails App and we will call it test
which will spin up an instance of our Rails app inside a container in order to
run our test suite.
In order to create a CI/CD pipeline with GitHub Actions, Github first expects a
.yml file to exist at .github/workflows/ directory at the root of our
project/repository.
Let's create the file now:
touch .github/workflows/rubyonrails.ymlBefore we add any configuration to our file, we need to give it a top level key
of name: in our case we'll call it "CI"
# .github/workflows/rubyonrails.yml

name: "CI"
.
.
.
Next we need to specify another top level key called on: which will tell
github actions at which events we want to trigger our ci/cd jobs to run.
We want our jobs to run every time we push to our main branch as well as when we
receive a pull_request. So let's add them.
# .github/workflows/rubyonrails.yml

name: "CI"
on:
  push:
    branches: [main]
  pull_request:
    branches: [main]
.
.
.
we can specify our jobs with our third and final top level key called (you
guessed it) jobs: let's start with our first job called test
# .github/workflows/rubyonrails.yml

name: "CI"
on:
  push:
    branches: [main]
  pull_request:
    branches: [main]
jobs:
  test:
.
.
.
The runs-on: key allows us to specify an existing pre-configured container or
virtual environment provided
to us by github that we can use to build our rails app as part of our CI process so we can run our test suite.
Here we are going to specify ubuntu-latest.
# .github/workflows/rubyonrails.yml

name: "CI"
on:
  push:
    branches: [main]
  pull_request:
    branches: [main]
jobs:
  test:
    runs-on: ubuntu-latest
.
.
.
Next is the services: key. Our Rails app uses postgres for it's database. Let's
add it.
# .github/workflows/rubyonrails.yml

name: "CI"
on:
  push:
    branches: [main]
  pull_request:
    branches: [main]
jobs:
  test:
    runs-on: ubuntu-latest
    services:
      postgres:
        image: postgres:11-alpine
        ports:
          - "5432:5432"
        env:
          POSTGRES_DB: rails_test
          POSTGRES_USER: rails
          POSTGRES_PASSWORD: password
.
.
.
Our postgres service has 3 seperate nested properties called image, ports, and env
Our image specifies an existing image provided to us by github actions.
The remaining properties ports and env contain some default boilerplate
settings: 5432:5432 as the default port and
POSTGRES_DB,POSTGRES_USER,POSTGRES_PASSWORD as our default
configuration for the postgres service itself.
Quick Note: If you're familiar with Docker and creating services with docker-compose,
you'll find the way jobs are composed familiar.
Next, we want to specify a couple envrionment variables for the instance of our
Rails app that will be running inside our test service.
RAILS_ENV: test: for the environment mode we want our Rails app to be running
in.
DATABASE_URL: "postgres://rails:password@localhost:5432/rails_test": is a
default url for Rails to connect to postgress inside our
environment.
# .github/workflows/rubyonrails.yml

name: "CI"
on:
  push:
    branches: [main]
  pull_request:
    branches: [main]
jobs:
  test:
    runs-on: ubuntu-latest
    services:
      postgres:
        image: postgres:11-alpine
        ports:
          - "5432:5432"
        env:
          POSTGRES_DB: rails_test
          POSTGRES_USER: rails
          POSTGRES_PASSWORD: password
    env:
      RAILS_ENV: test
      DATABASE_URL: "postgres://rails:password@localhost:5432/rails_test"
.
.
.
And finally, we can get to the meat and potatoes of building and configuring our
test job, the steps: key.
The steps: key allows us to specify a number of steps in order to
spin up our Rails app and run our test suite.
My App is using Rails6 and uses webpacker to compile a little bit of React
code, so my steps look like this:
steps:
  - name: Checkout code
    uses: actions/checkout@v3
  - name: Install Ruby and gems
    uses: ruby/setup-ruby@8f312efe1262fb463d906e9bf040319394c18d3e # v1.92
    with:
      bundler-cache: true
  - name: Set up database schema
    run: bin/rails db:schema:load
  - name: Install yarn
    run: |
      sudo apt-get install yarn
  - name: Add webpacker before yarn install # solves node-sass error
    run: |
      yarn add @rails/webpacker
  - name: yarn install --check-files # --check-files ensures @rails/webpacker dependencies aren't overwritten
    run: |
      sudo yarn install --check-files
  - name: Compile Webpacker
    run: bundle exec rails webpacker:compile
  - name: Run RSpec tests
    run: bundle exec rspec
Your mileage may vary on this step. If you're app doesn't use webpacker, feel free to remove those individual steps. Now let's add them to our workflow file:
# .github/workflows/rubyonrails.yml

name: "CI"
on:
  push:
    branches: [main]
  pull_request:
    branches: [main]
jobs:
  test:
    runs-on: ubuntu-latest
    services:
      postgres:
        image: postgres:11-alpine
        ports:
          - "5432:5432"
        env:
          POSTGRES_DB: rails_test
          POSTGRES_USER: rails
          POSTGRES_PASSWORD: password
    env:
      RAILS_ENV: test
      DATABASE_URL: "postgres://rails:password@localhost:5432/rails_test"
    steps:
      - name: Checkout code
        uses: actions/checkout@v3
      - name: Install Ruby and gems
        uses: ruby/setup-ruby@8f312efe1262fb463d906e9bf040319394c18d3e # v1.92
        with:
          bundler-cache: true
      - name: Set up database schema
        run: bin/rails db:schema:load
      - name: Install yarn
        run: |
          sudo apt-get install yarn
      - name: Add webpacker before yarn install # solves node-sass error
        run: |
          yarn add @rails/webpacker
      - name: yarn install --check-files # --check-files ensures @rails/webpacker dependencies aren't overwritten
        run: |
          sudo yarn install --check-files
      - name: Compile Webpacker
        run: bundle exec rails webpacker:compile
      - name: Run RSpec tests
        run: bundle exec rspec
.
.
.
Now, once we push this file up to our github repository, github actions will begin automatically.
Assuming that our test suite passes in development on our
machine, and that our steps are properly configured for our particular Rails
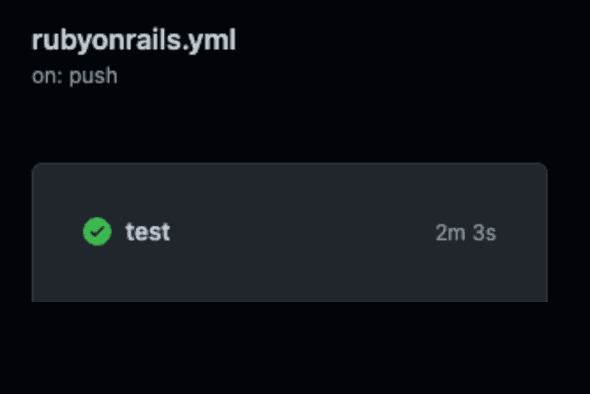
app (again, your mileage may vary), we should see a green checkmark next to our test job signifiying that our
CI completed successfully!
Note: We can view the jobs by visiting the Actions tab of our repository on
github.com github.com/username/project_name/actions
Homework (Add more jobs)
Here's a great opportunity to expand your knowledge of CI/CD and add your own
custom jobs to your rubyonrails.yml workflow file.
How about a new job called audit that will check your rails project code for security
vulnerabilities? There are a couple great gems for this btw:
or maybe a job called lint which will use the rubocop gem to lint your code?
Here's what those jobs might look like:
audit:
  runs-on: ubuntu-latest
  steps:
    - name: Checkout code
      uses: actions/checkout@v3
    - name: Install Ruby and gems
      uses: ruby/setup-ruby@8f312efe1262fb463d906e9bf040319394c18d3e # v1.92
      with:
        bundler-cache: true
    # Add or replace any other lints here
    - name: Security audit dependencies
      run: bundle exec bundler-audit --update
    - name: Security audit application code
      run: bundle exec brakeman -q -w2
lint:
  runs-on: ubuntu-latest
  steps:
    - name: Checkout code
      uses: actions/checkout@v3
    - name: Install Ruby and gems
      uses: ruby/setup-ruby@8f312efe1262fb463d906e9bf040319394c18d3e # v1.92
      with:
        bundler-cache: true
    - name: Lint Ruby files
      run: bundle exec rubocop --parallel
